[RainBowText] > 本教程分三种不同的部署方法,如下所示; > > - Vercel > - CloudFlare > - Netlify > > > 都是围绕着 Hexo来的 > > [/RainBowText] ## 先前条件 - Git客户端 - VS Code - nodejs环境 - GitHub账号 - 一个域名 ## 环境准备 (这里以 Windows 环境为例) ### 安装 NodeJS 环境 下载地址:https://nodejs.cn/download/ ### 安装 Git 客户端 下载地址: - https://git-scm.com/downloads - https://gitforwindows.org/ ### 配置 NodeJS #### 配置镜像加速 > 参考:https://npmmirror.com/ ```bash npm config set registry https://registry.npmmirror.com # 或者在 cmd 或者 powershell中使用 set env 配置http代理也可以 ``` #### 安装必要软件包 ```bash npm install -g hexo-cli hexo # -g 为全局安装 ``` 如果提示 `command not found` 要检查你的 npm 环境变量是否有问题 ### 初始化网站 > 可以先创建一个文件夹myblog,然后cd到这个文件夹下(或者在这个文件夹下直接右键git bash打开)。 执行如下命令 ```bash hexo init ``` 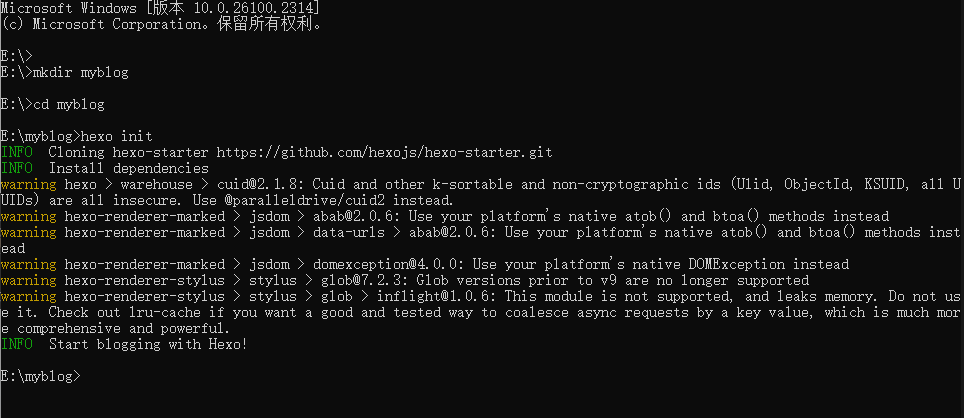 ### 启动网站 > 完了我们要先看一下网站是否可以能够正常启动,能够正常启动说明依赖没问题 ```bash hexo server hexo s # 这个是上面命令的缩写 ``` 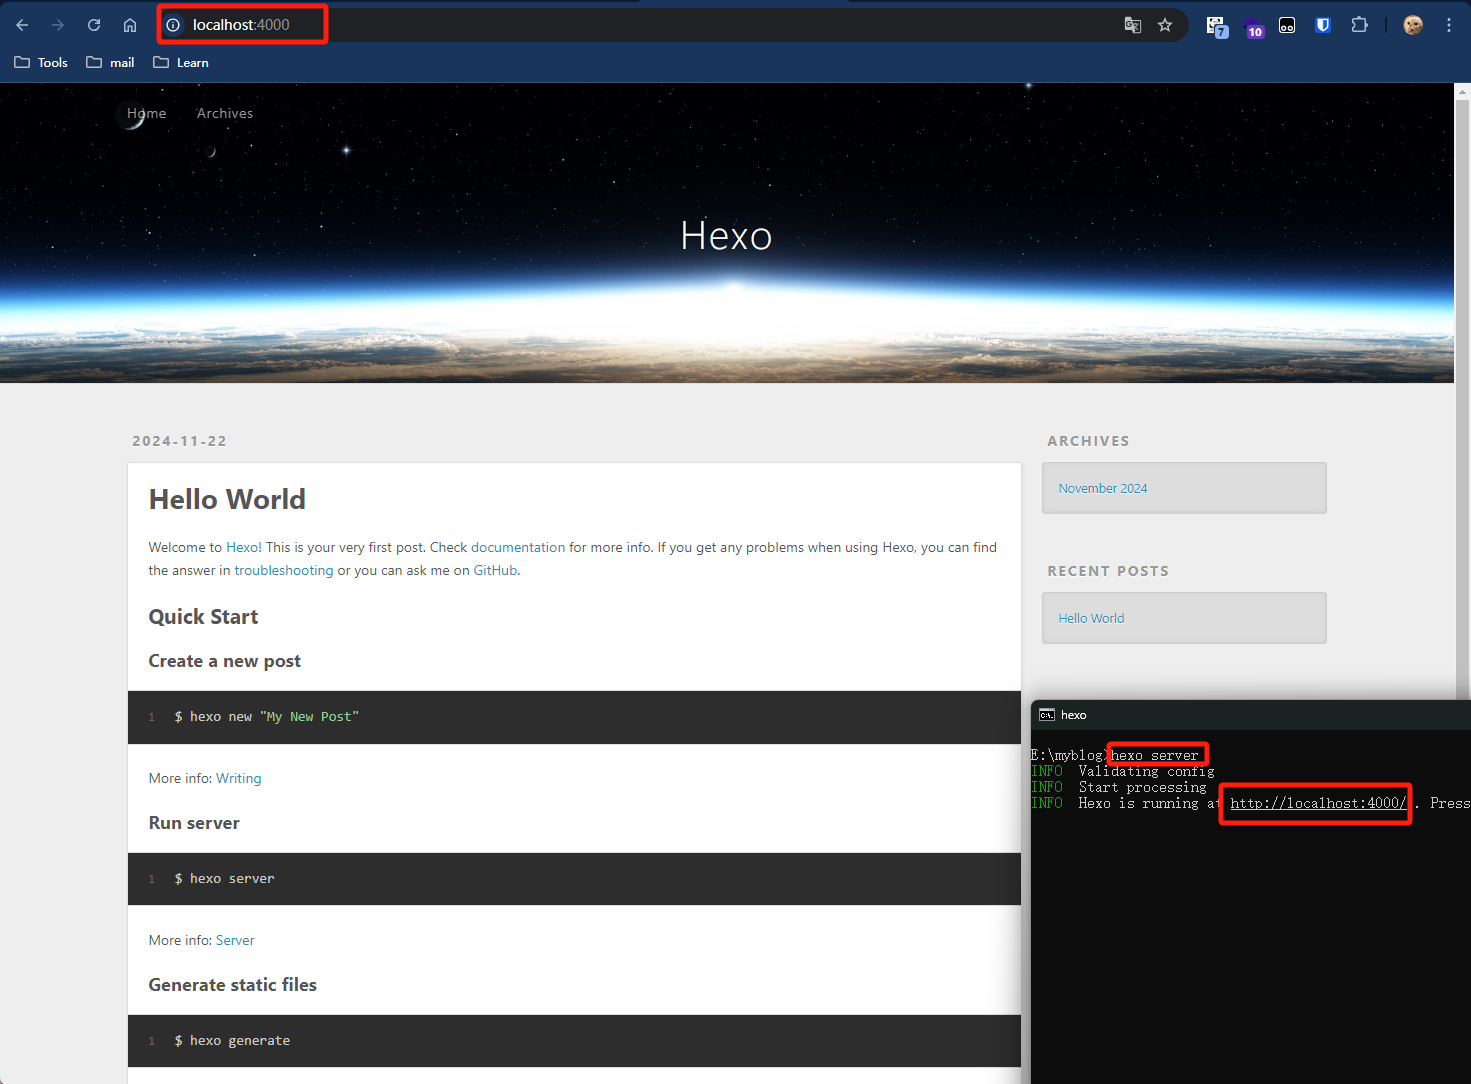 ### 配置主题 Hexo的默认主题应该没人会用吧,,,,所以我们需要找几个自己喜欢的主题进行配置,这里推荐几个 - https://github.com/jerryc127/hexo-theme-butterfly - https://github.com/fluid-dev/hexo-theme-fluid - https://blog.zhheo.com/update/ 怎么配置我就不写了,主题文档都有详尽教程 ### 上传代码 > 现在,假如你的网站已经做好了,接下来我们需要把你的网站提交到 Github代码仓库中,然后就可以将其部署到各种 Serverless 平台了 1、在 github 中创建一个新的仓库,用来存储你的 hexo 博客系统的代码,以及后续的迭代更新,部署等。 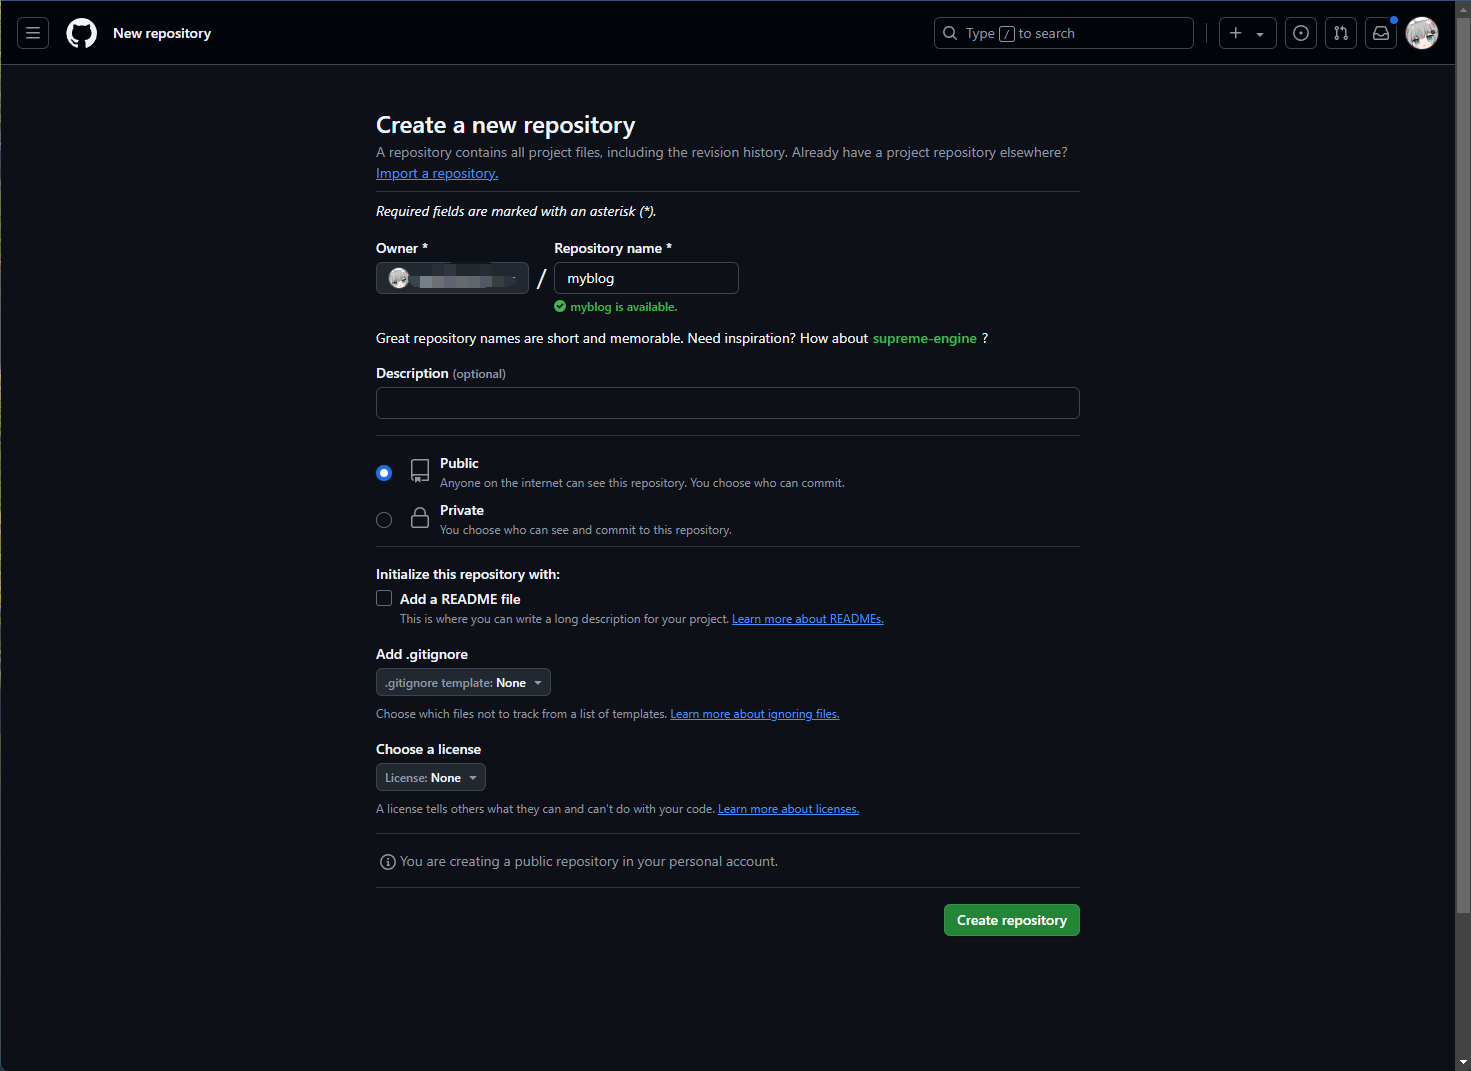 2、然后按照提示说明初始化仓库 一定要在你之前执行 `hexo init` 的目录下执行 ```bash echo "# myblog" >> README.md git init git add README.md git commit -m "first commit" git branch -M main git remote add origin https://github.com/github_username/myblog.git git push -u origin main ``` 3、初始化完成之后刷新你的github仓库页面你会看到有一个 README.md 文件说明成功了 4、 然后我们可以通过 git 命令将我们的 hexo 博客提交到github中 ```bash git add . git commit -m "first commit" git push ``` 完了之后你的本地的hexo博客系统的代码就会上传到github中了  ### 部署网站 #### 部署到 CloudFlare > 首先我们需要一个 cloudflare 账号 没有的话自己注册 > > https://cloudflare.com 找到 Worker 和 Pages 页面,点击创建 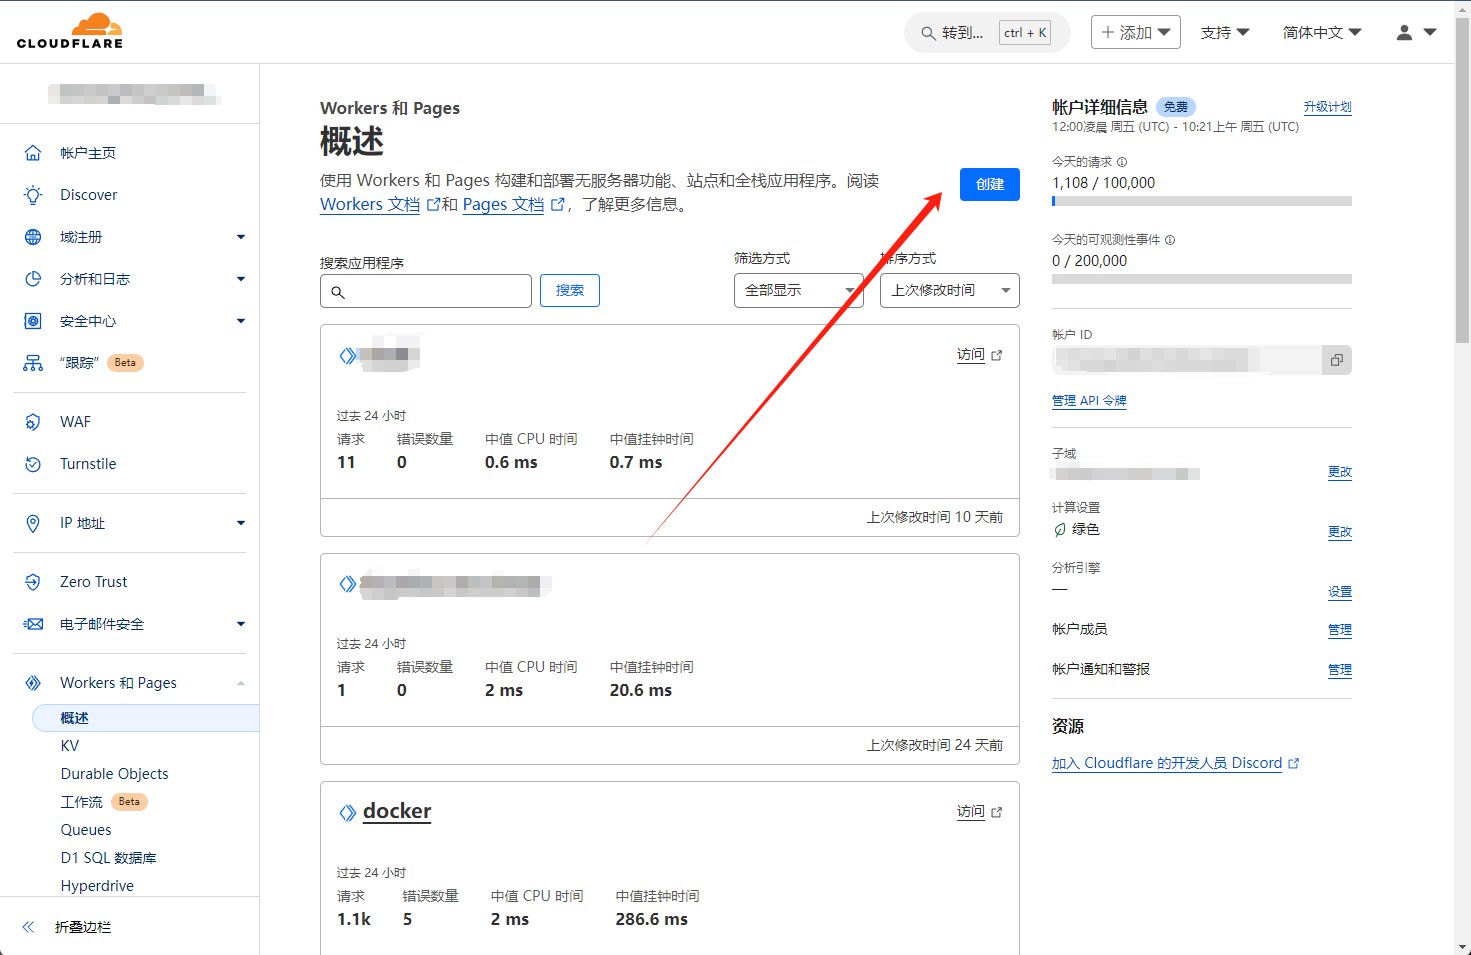 选择 Pages 并点击链接到 Git 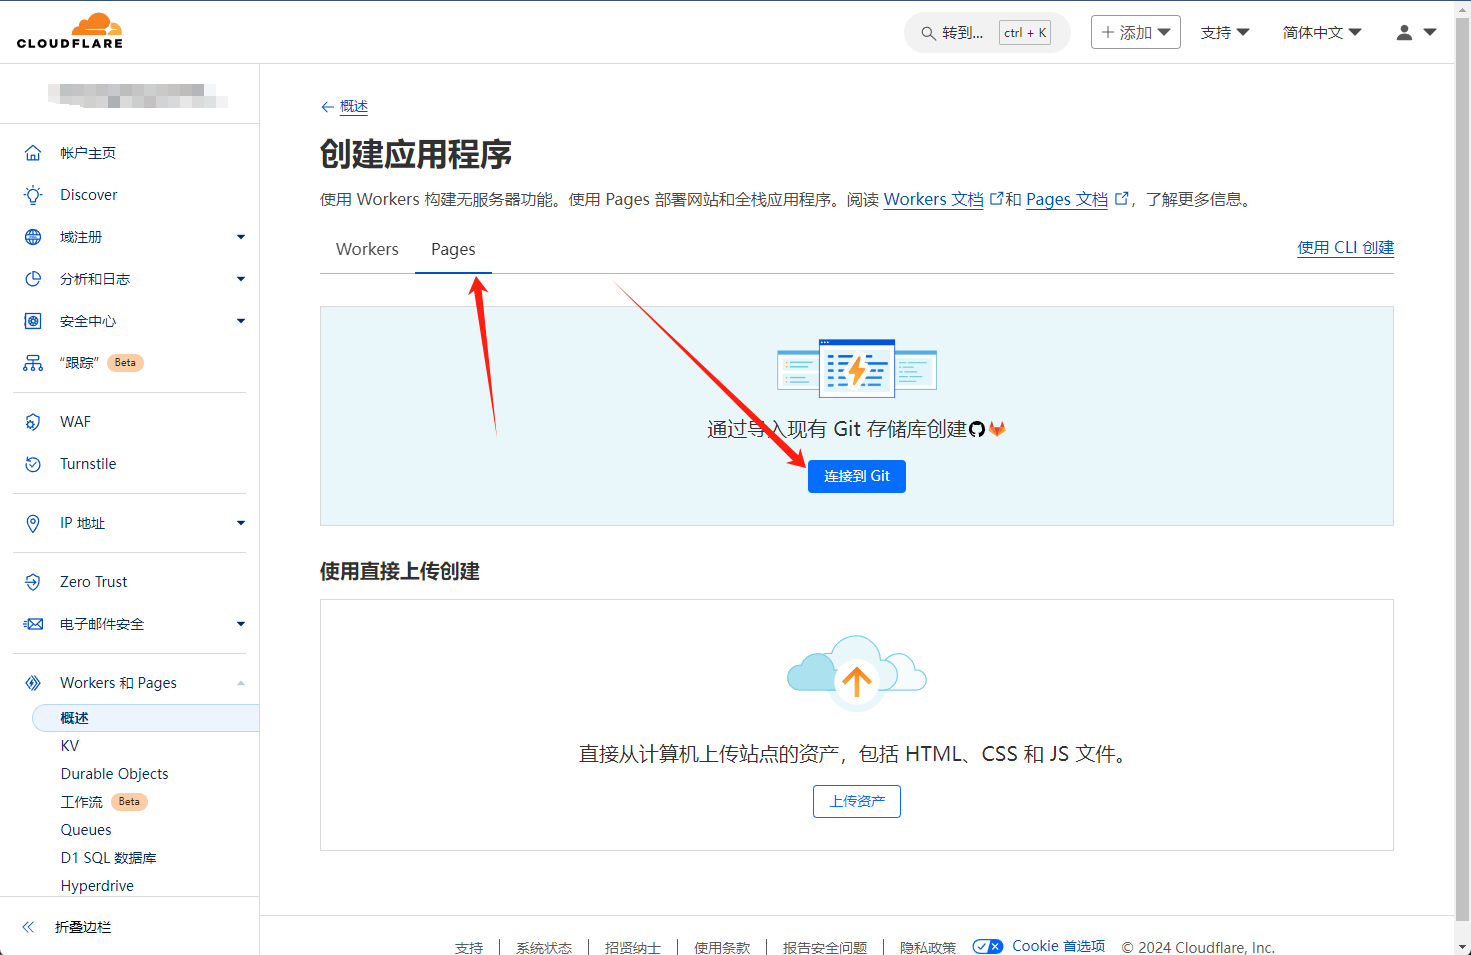 添加你的 GitHub 账户 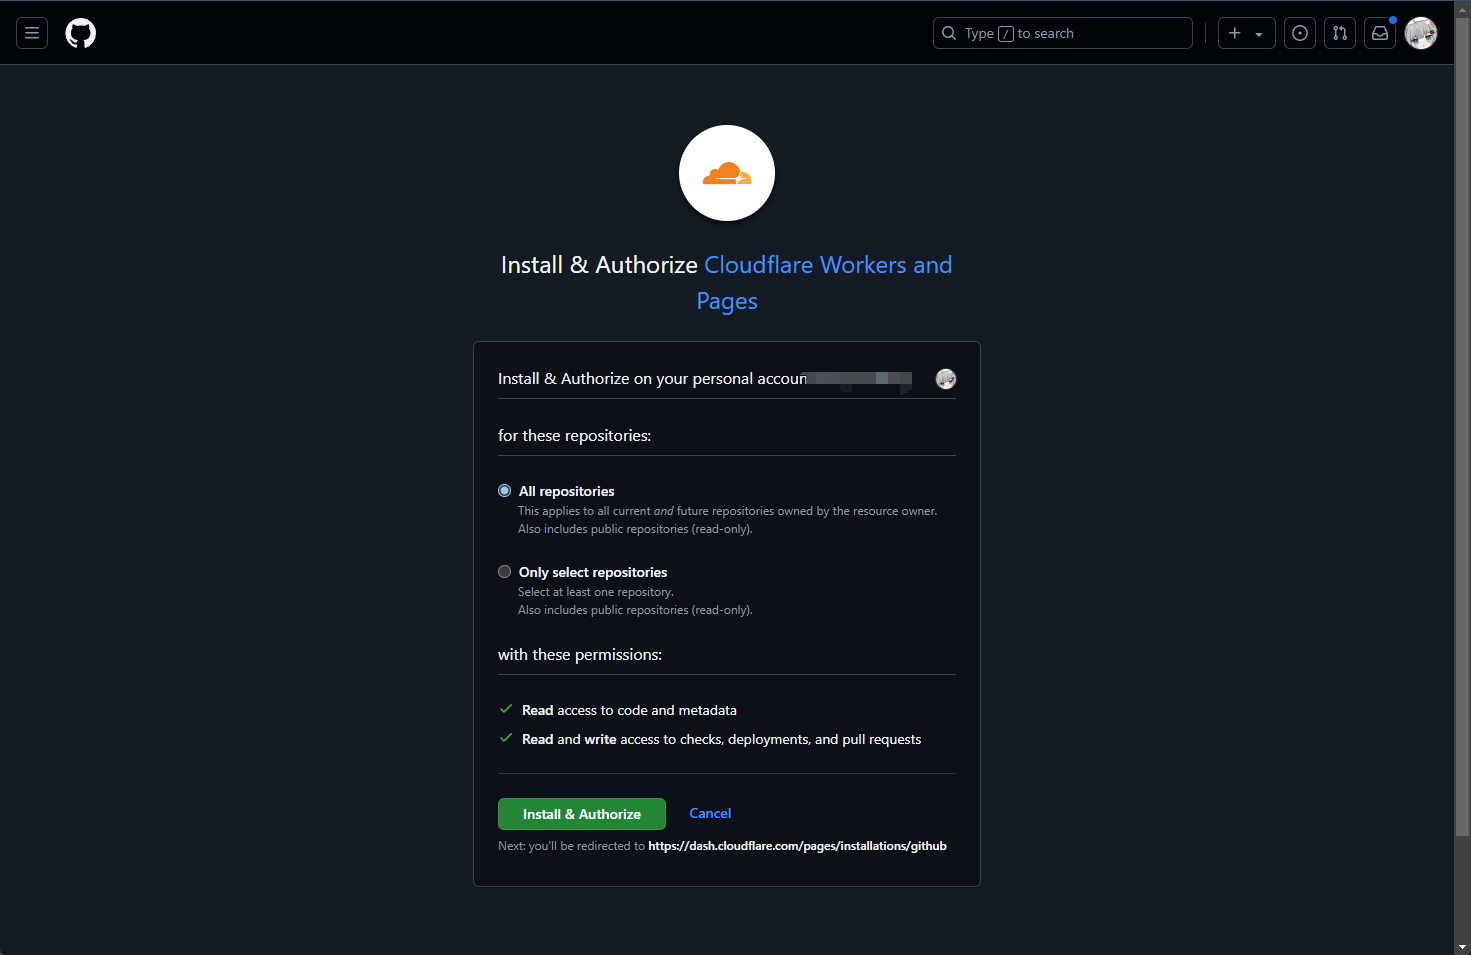 选择你的仓库,并点击右下角的开始设置 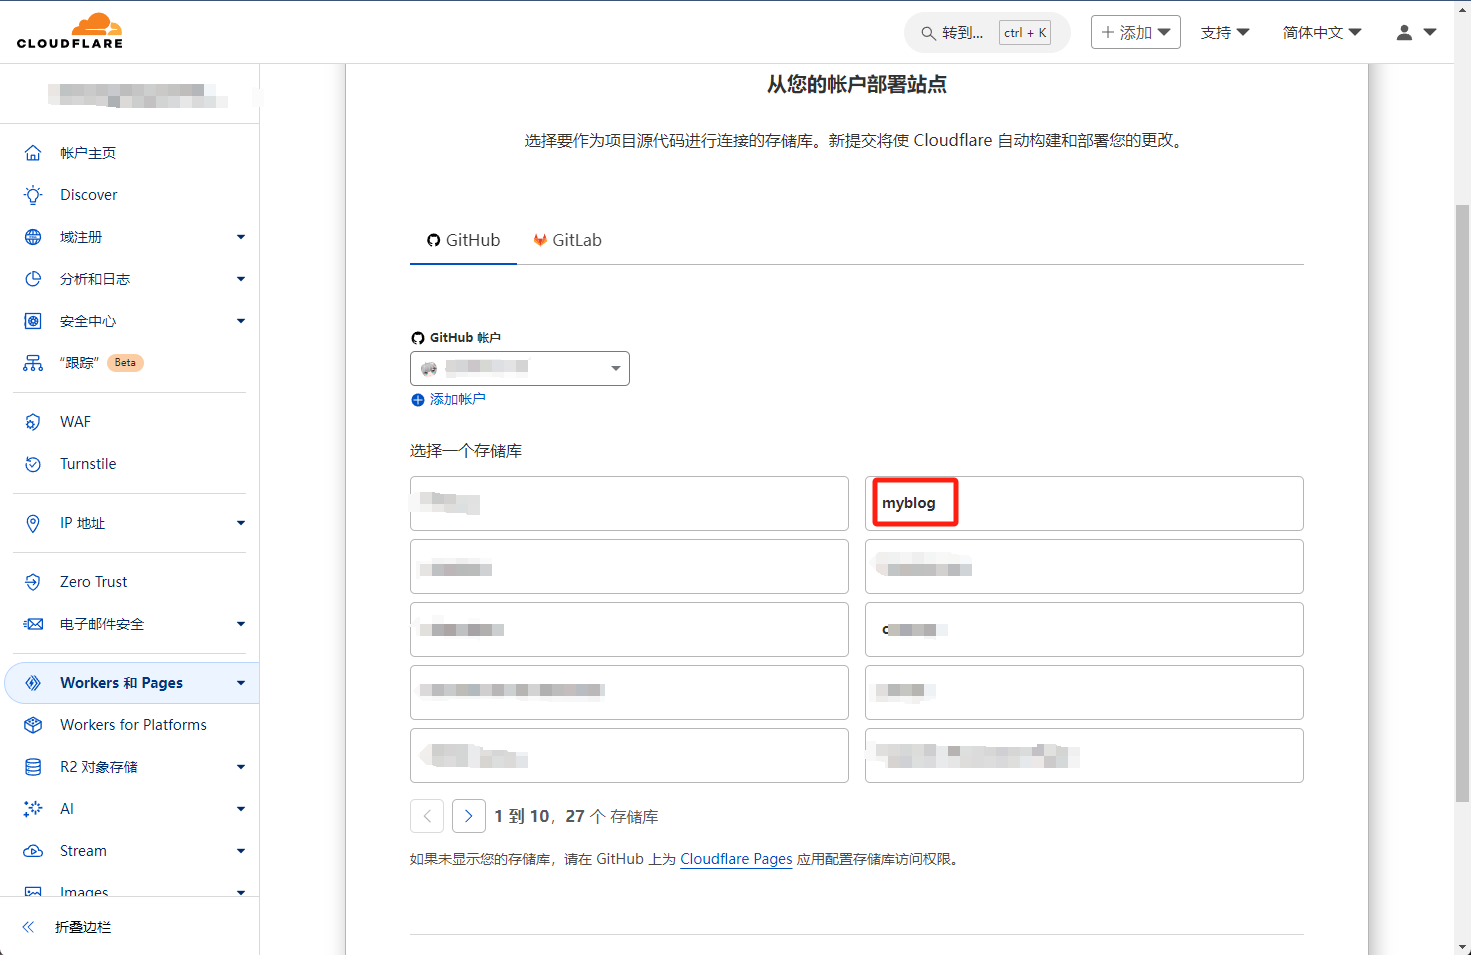 然后构建配置命令这里一定要输入 `npx hexo generate` 部署完成后就可以访问了 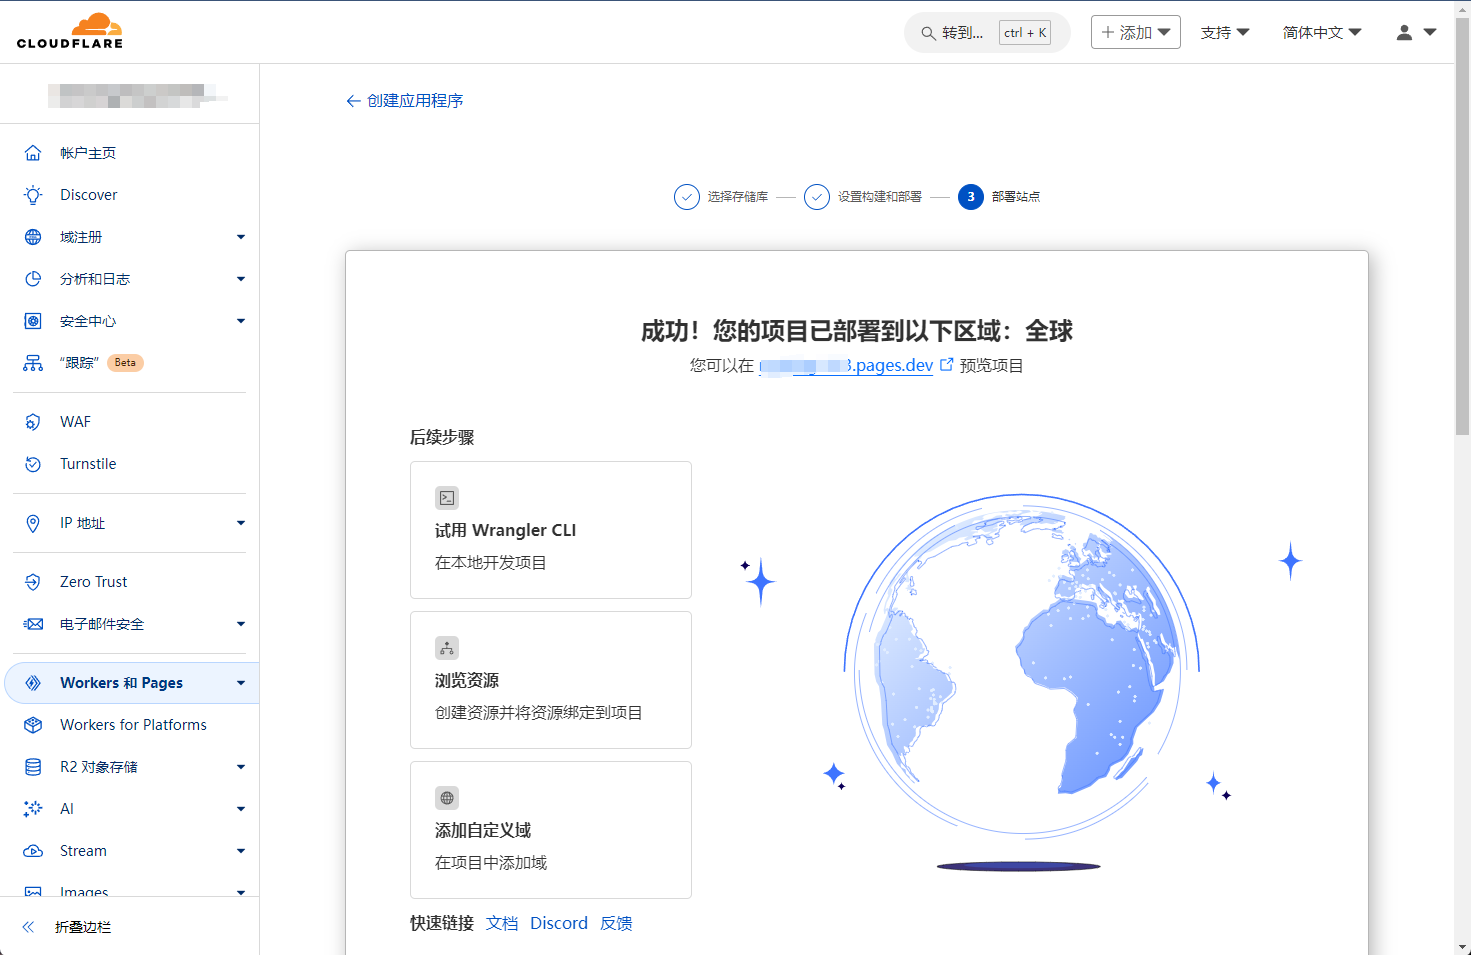 最后我们可以自定义域中绑定你自己的域名,然后就可以用你的域名访问你的网站了。 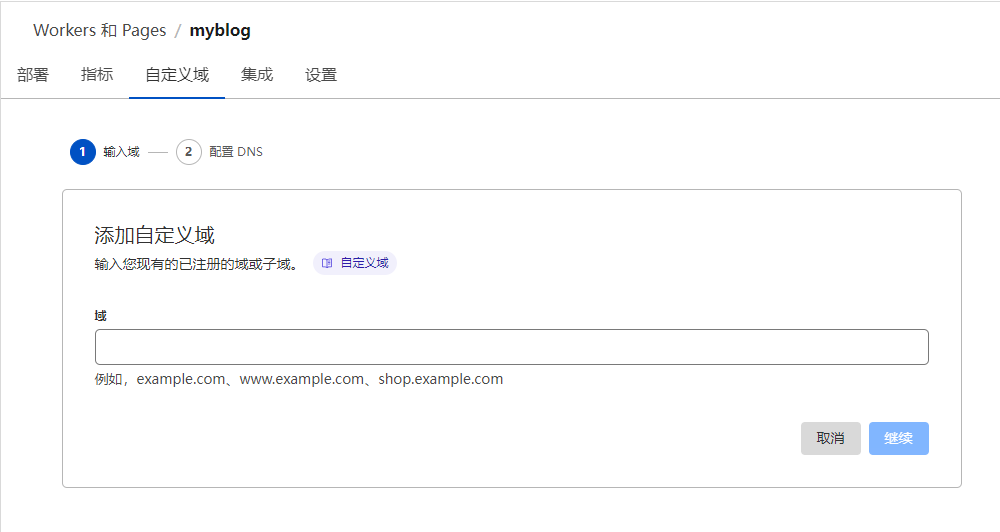 #### 部署到 Vercel > 在 https://vercel.com/ 中注册一个账号 然后添加一个新项目 (好像可以直接用GitHub登录来着我也忘了。。。)  同样也是选择你的项目,点击 import 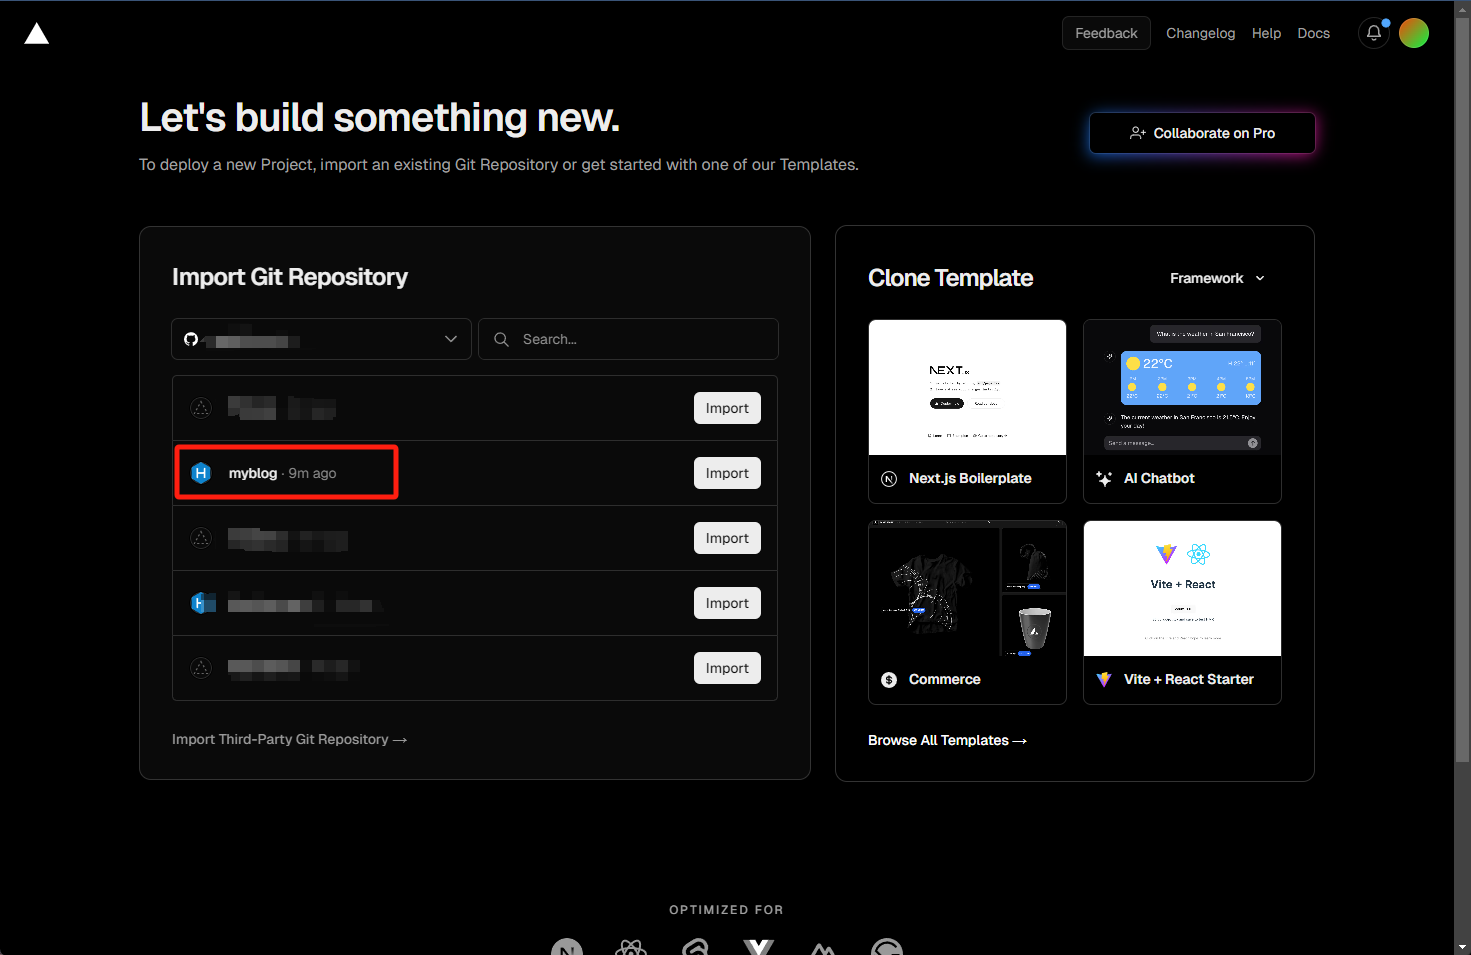 这里直接点击 Deploy 即可 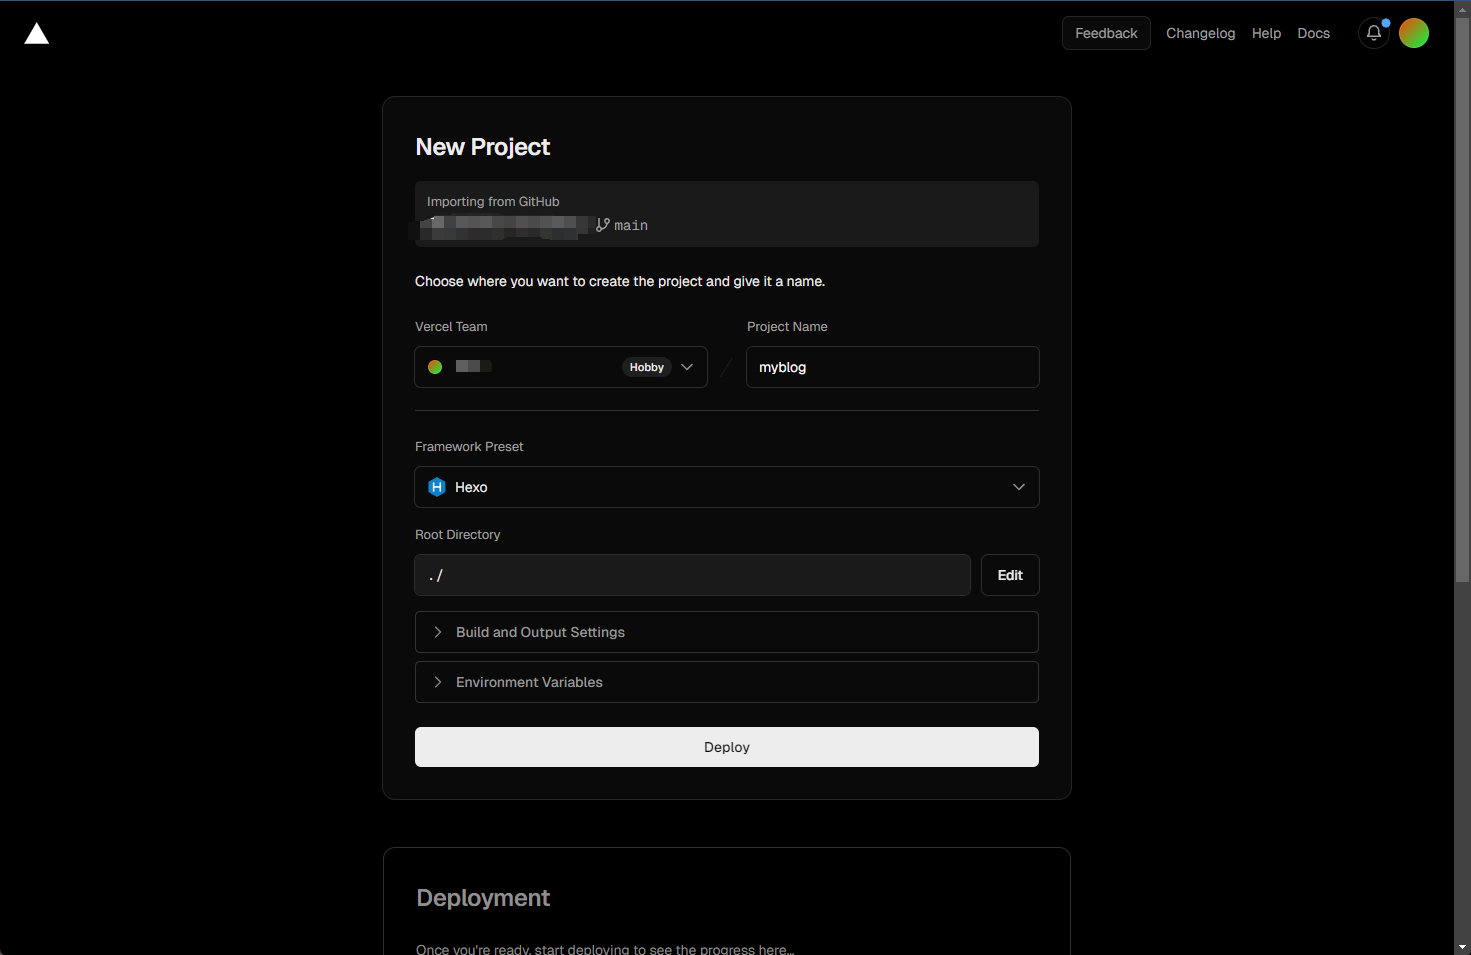 部署完成之后 可以点击 Continue to Dashboard 访问 Serverless 控制台  默认自带的域名,这个域名国内被墙了,需要绑定自定义域名才能访问 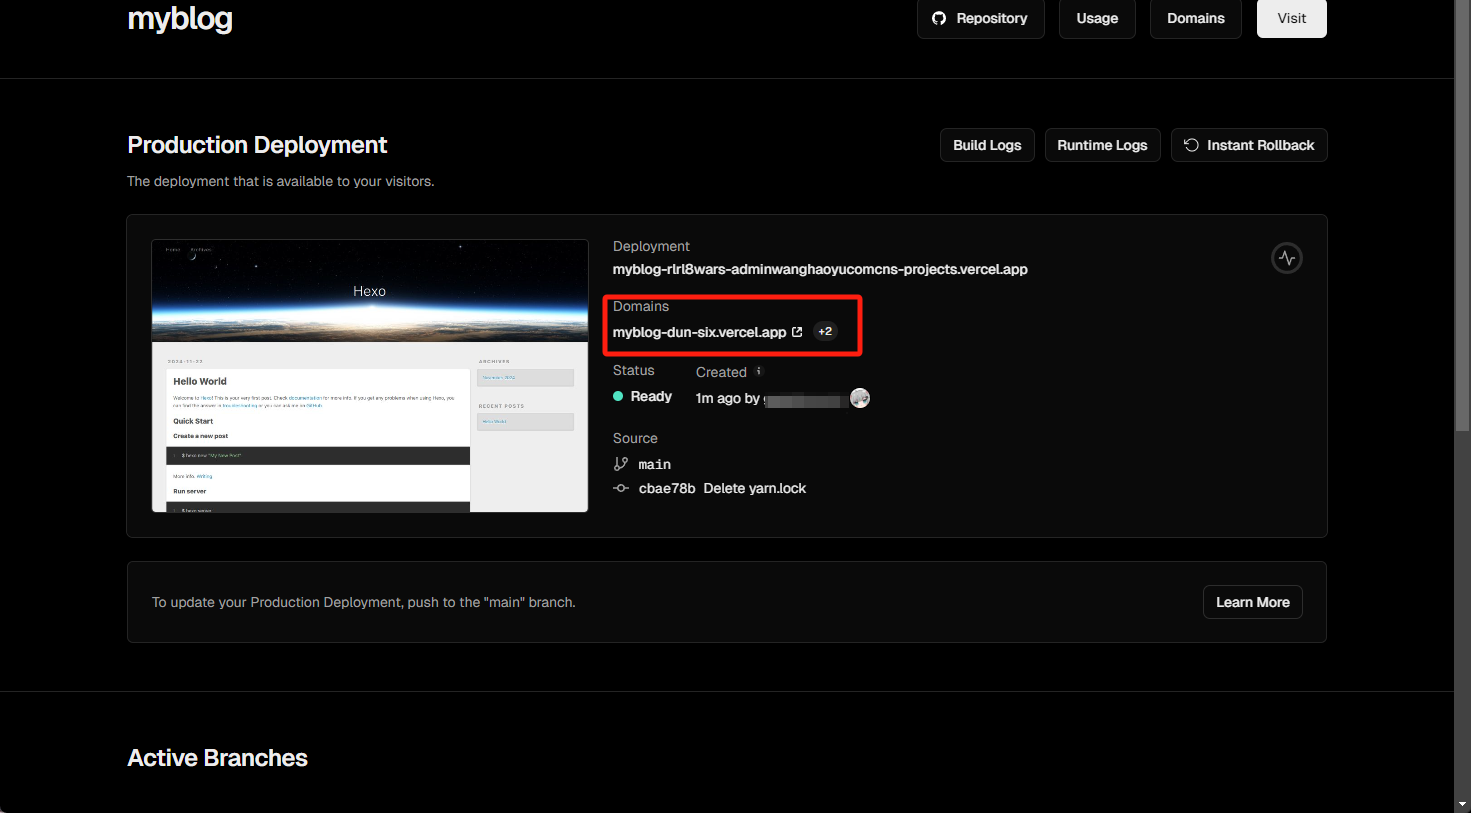 点击右上角 Domains 绑定自定义域名即可。 #### 部署到 Netlify > https://app.netlify.com/login > > 注册一个 Netlify 账号, 直接 GitHub 登录也可以 导入项目 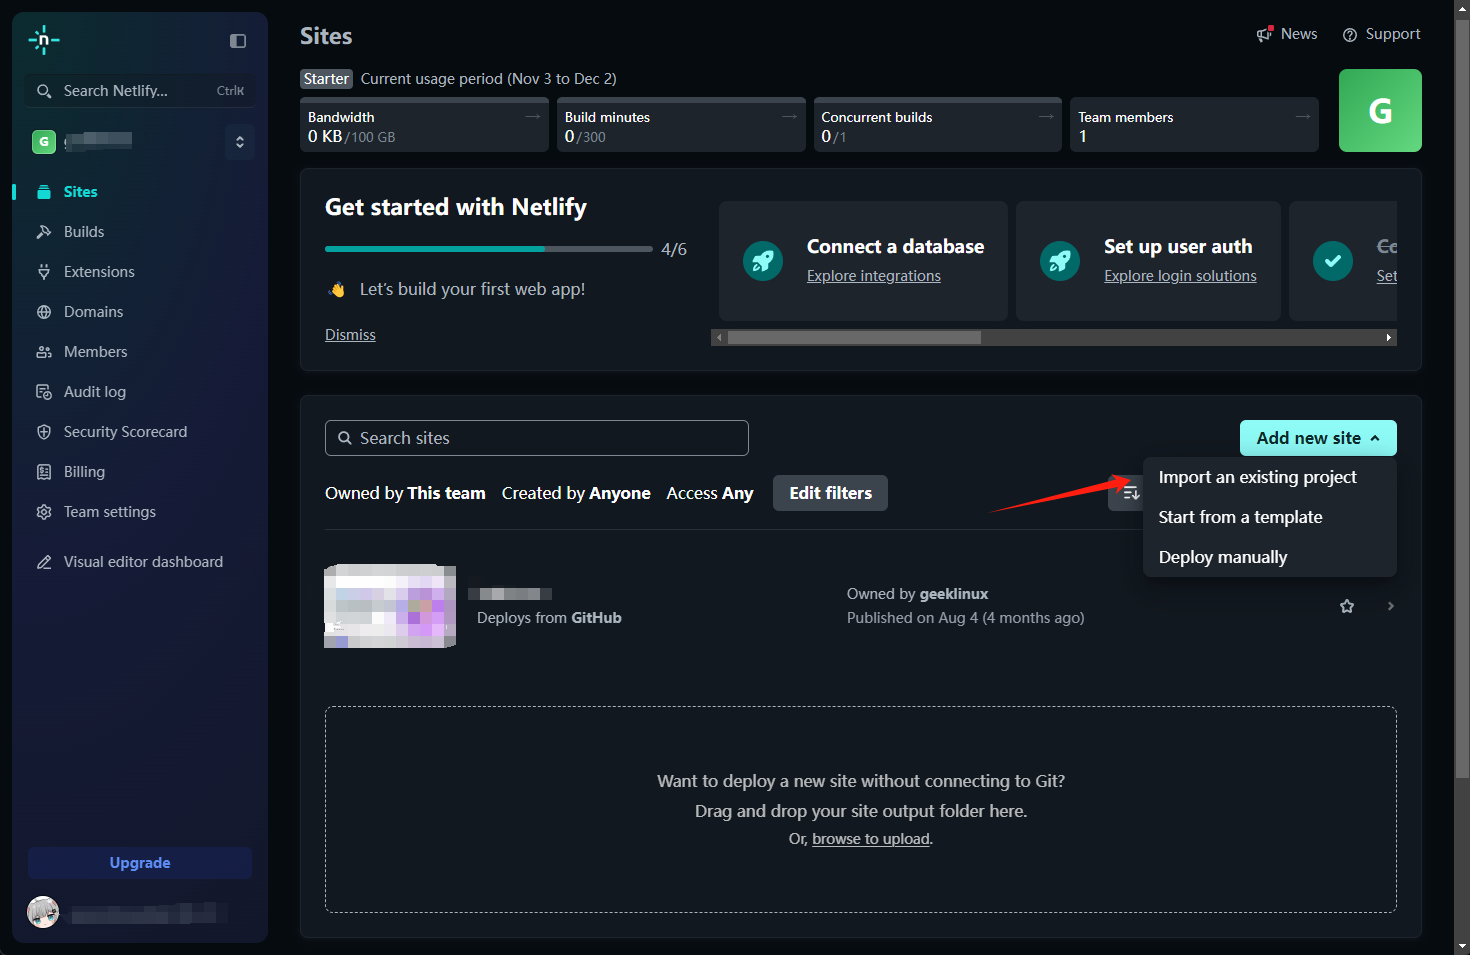 选择 GitHub,会自动进行验证 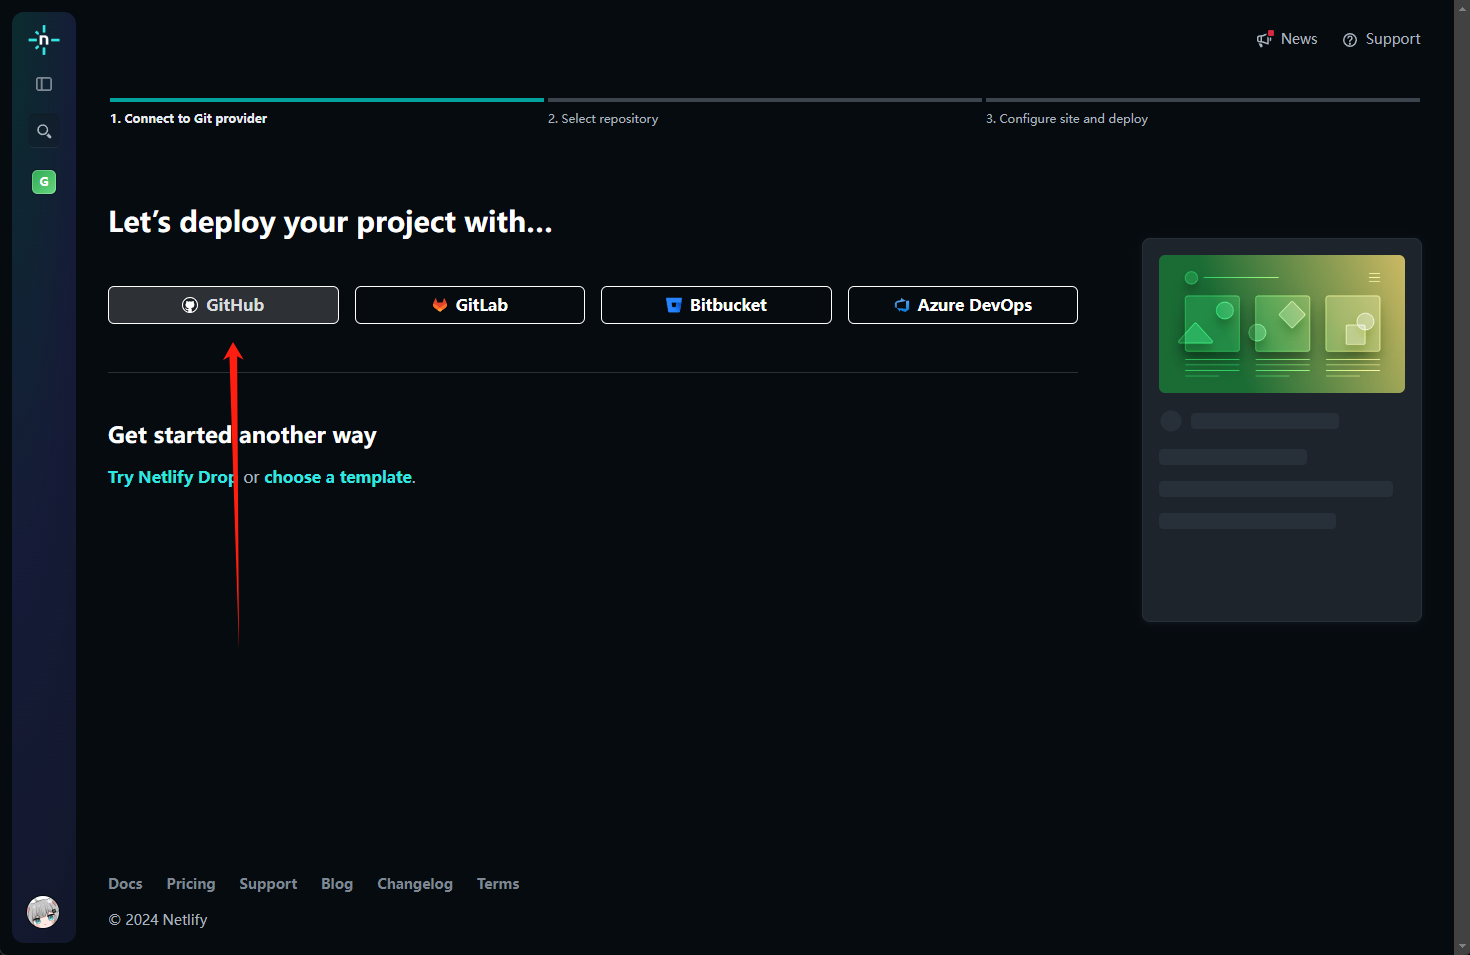 选择你的仓库,**将默认的`npm run build` 修改为 `npx hexo generate`,**然后直接 Deploy即可 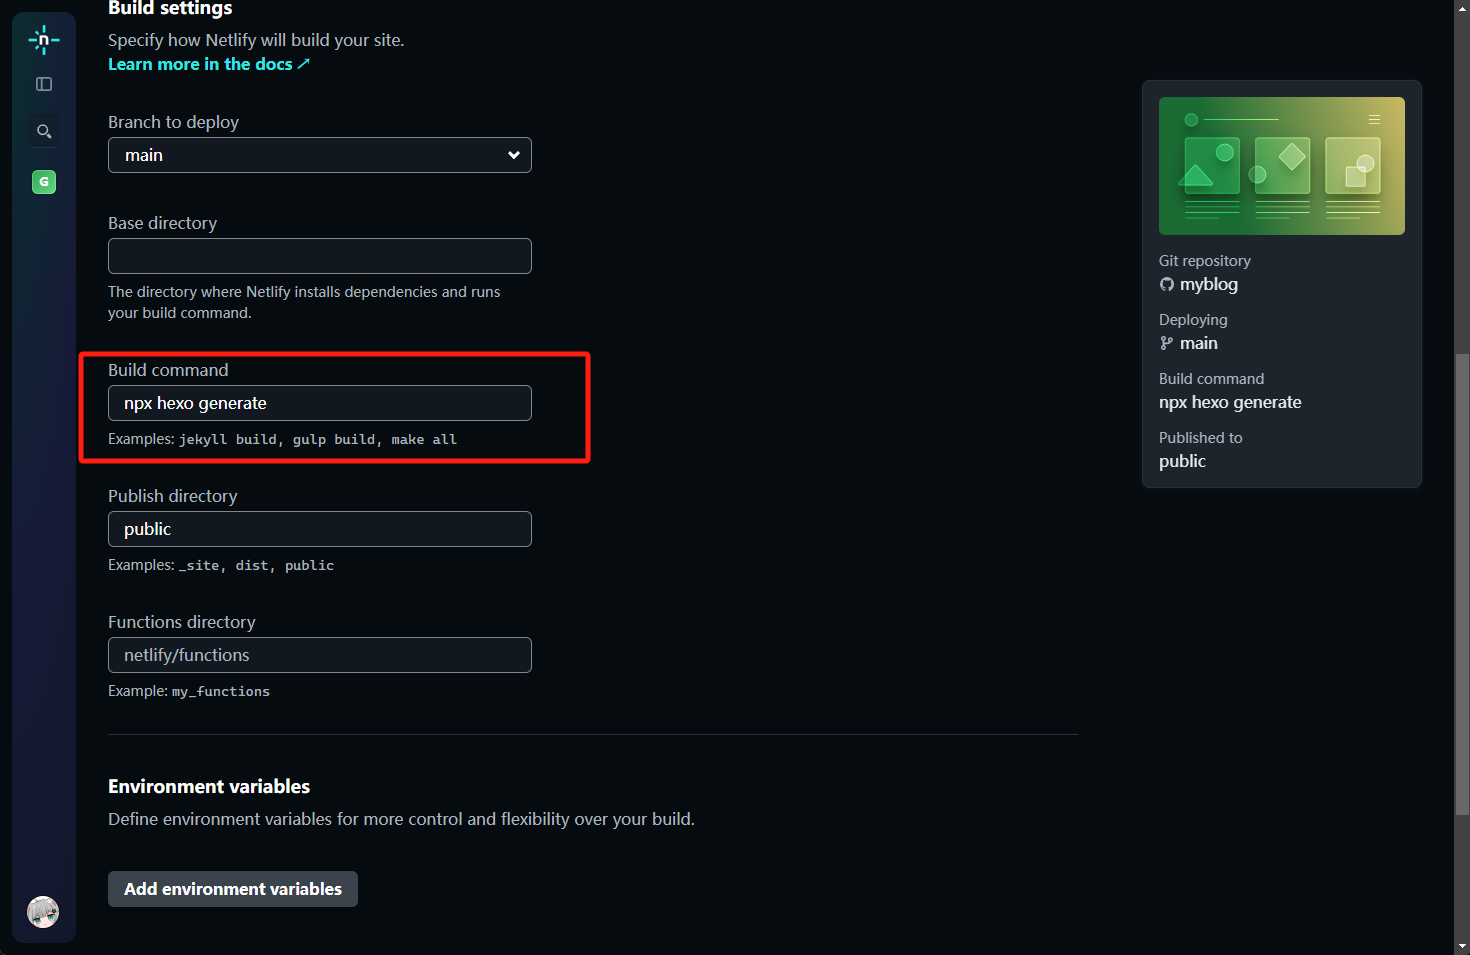  自定义域名在 Domain Management 中 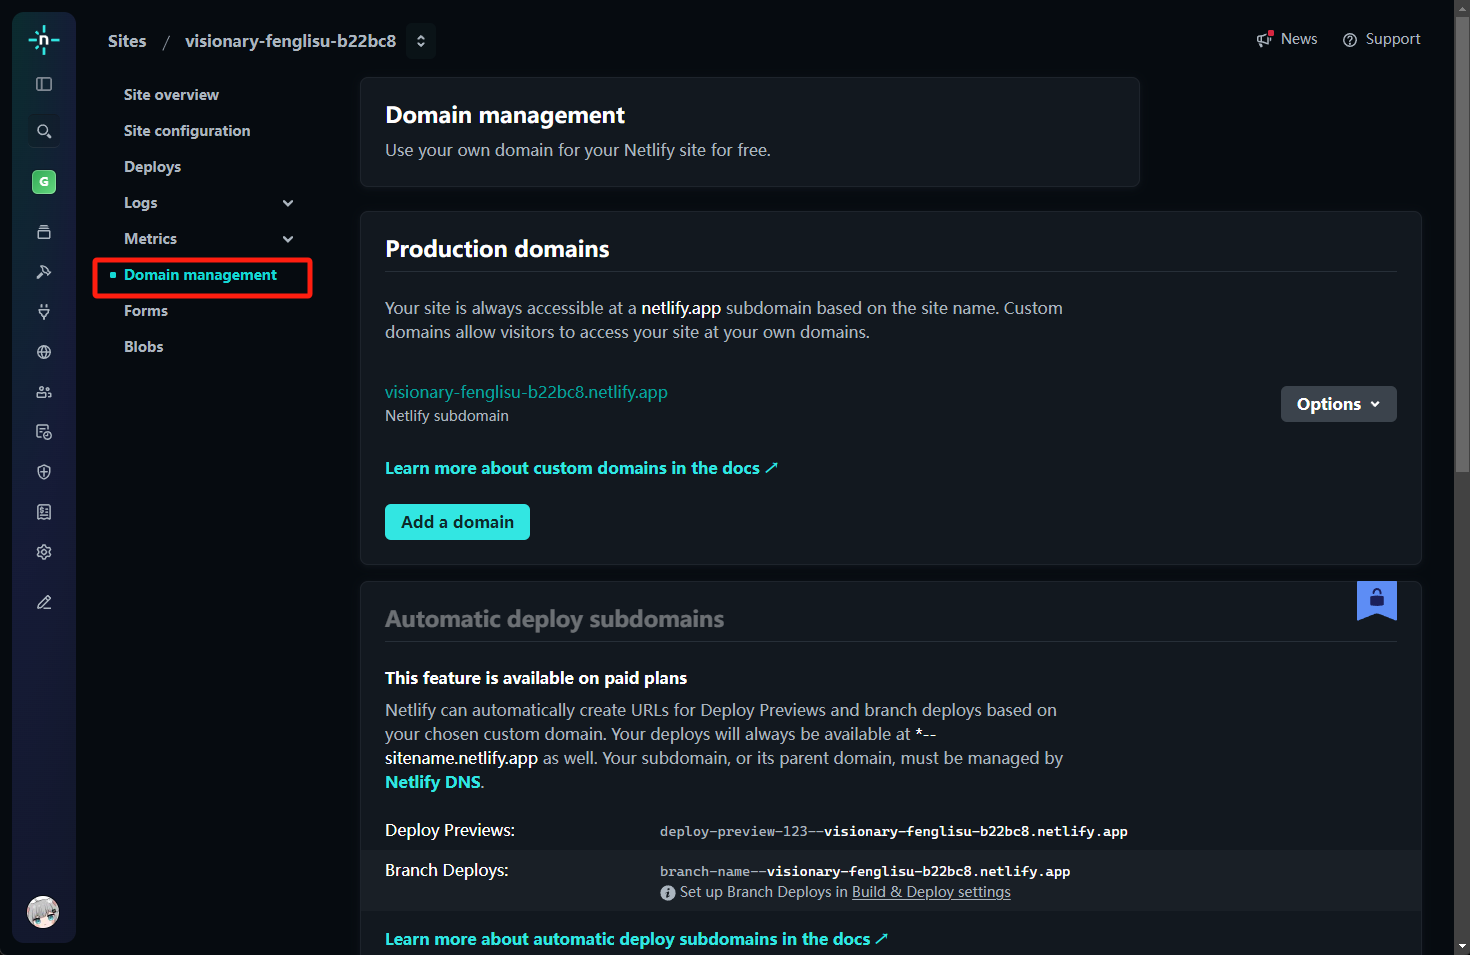 Loading... [RainBowText] > 本教程分三种不同的部署方法,如下所示; > > - Vercel > - CloudFlare > - Netlify > > > 都是围绕着 Hexo来的 > > [/RainBowText] ## 先前条件 - Git客户端 - VS Code - nodejs环境 - GitHub账号 - 一个域名 ## 环境准备 (这里以 Windows 环境为例) ### 安装 NodeJS 环境 下载地址:https://nodejs.cn/download/ ### 安装 Git 客户端 下载地址: - https://git-scm.com/downloads - https://gitforwindows.org/ ### 配置 NodeJS #### 配置镜像加速 > 参考:https://npmmirror.com/ ```bash npm config set registry https://registry.npmmirror.com # 或者在 cmd 或者 powershell中使用 set env 配置http代理也可以 ``` #### 安装必要软件包 ```bash npm install -g hexo-cli hexo # -g 为全局安装 ``` 如果提示 `command not found` 要检查你的 npm 环境变量是否有问题 ### 初始化网站 > 可以先创建一个文件夹myblog,然后cd到这个文件夹下(或者在这个文件夹下直接右键git bash打开)。 执行如下命令 ```bash hexo init ```  ### 启动网站 > 完了我们要先看一下网站是否可以能够正常启动,能够正常启动说明依赖没问题 ```bash hexo server hexo s # 这个是上面命令的缩写 ```  ### 配置主题 Hexo的默认主题应该没人会用吧,,,,所以我们需要找几个自己喜欢的主题进行配置,这里推荐几个 - https://github.com/jerryc127/hexo-theme-butterfly - https://github.com/fluid-dev/hexo-theme-fluid - https://blog.zhheo.com/update/ 怎么配置我就不写了,主题文档都有详尽教程 ### 上传代码 > 现在,假如你的网站已经做好了,接下来我们需要把你的网站提交到 Github代码仓库中,然后就可以将其部署到各种 Serverless 平台了 1、在 github 中创建一个新的仓库,用来存储你的 hexo 博客系统的代码,以及后续的迭代更新,部署等。  2、然后按照提示说明初始化仓库 一定要在你之前执行 `hexo init` 的目录下执行 ```bash echo "# myblog" >> README.md git init git add README.md git commit -m "first commit" git branch -M main git remote add origin https://github.com/github_username/myblog.git git push -u origin main ``` 3、初始化完成之后刷新你的github仓库页面你会看到有一个 README.md 文件说明成功了 4、 然后我们可以通过 git 命令将我们的 hexo 博客提交到github中 ```bash git add . git commit -m "first commit" git push ``` 完了之后你的本地的hexo博客系统的代码就会上传到github中了  ### 部署网站 #### 部署到 CloudFlare > 首先我们需要一个 cloudflare 账号 没有的话自己注册 > > https://cloudflare.com 找到 Worker 和 Pages 页面,点击创建  选择 Pages 并点击链接到 Git  添加你的 GitHub 账户  选择你的仓库,并点击右下角的开始设置  然后构建配置命令这里一定要输入 `npx hexo generate` 部署完成后就可以访问了  最后我们可以自定义域中绑定你自己的域名,然后就可以用你的域名访问你的网站了。  #### 部署到 Vercel > 在 https://vercel.com/ 中注册一个账号 然后添加一个新项目 (好像可以直接用GitHub登录来着我也忘了。。。)  同样也是选择你的项目,点击 import  这里直接点击 Deploy 即可  部署完成之后 可以点击 Continue to Dashboard 访问 Serverless 控制台  默认自带的域名,这个域名国内被墙了,需要绑定自定义域名才能访问  点击右上角 Domains 绑定自定义域名即可。 #### 部署到 Netlify > https://app.netlify.com/login > > 注册一个 Netlify 账号, 直接 GitHub 登录也可以 导入项目  选择 GitHub,会自动进行验证  选择你的仓库,**将默认的`npm run build` 修改为 `npx hexo generate`,**然后直接 Deploy即可   自定义域名在 Domain Management 中  Last modification:April 25, 2025 © Allow specification reprint Support Appreciate the author Like 如果觉得我的文章对你有用,请随意赞赏