最近“心血来潮” 将博客网站迁移到了 Hexo,但是 Hexo 部署到 服务器后,由于我是多服务器+Vercel的环境,为了方便,就想了一个办法,实现了与Vercel一样的功能,使用 GitHub WebHook ,下面介绍一下实现过程 ### 1. 先介绍一下什么是什么是 Webhook Webhook 是一种基于 HTTP 回调的机制,允许应用在特定事件发生时向指定 URL 发送 `POST` 请求,从而触发后续操作。例如,GitHub Webhook 可在代码推送时触发,这里我设置了一台主服务器,通知服务器通过脚本拉取最新代码完成部署,然后同步到其他服务器中 ### 2. Webhook 服务器配置 这里为了方便使用 Express写了个 Webhook 服务器,监听 GitHub 推送事件,并执行部署脚本。 #### 2.1 安装 Node.js 环境 可以参考我的另一篇文章: https://www.wanghaoyu.com.cn/archives/linux-nodejs-deploy.html? #### 2.2 创建 Webhook 服务器 在你的hexo目录下安装express以及相关依赖 ```bash pnpm install express crypto child_process fs ``` #### 2.3 编写 Webhook 服务器代码 创建 `server.js`,代码如下: ```javascript const express = require("express"); const crypto = require("crypto"); const { exec } = require("child_process"); const fs = require("fs"); const app = express(); const PORT = 5000; const SECRET = "secret"; // 在 GitHub Webhook 配置中填写相同的 Secret const STATUS_FILE = "./deploy_status.json"; app.use(express.json()); const getLastDeployStatus = () => { if (fs.existsSync(STATUS_FILE)) { return JSON.parse(fs.readFileSync(STATUS_FILE, "utf8")); } return { last_deploy: "Never", status: "Not deployed yet" }; }; app.get("/", (req, res) => { res.json({ message: "Server is running", status: "ok" }); }); app.get("/deploy-status", (req, res) => { res.json(getLastDeployStatus()); }); app.post("/post-receive", (req, res) => { const signature = req.headers["x-hub-signature-256"]; const hmac = crypto.createHmac("sha256", SECRET); const digest = `sha256=${hmac.update(JSON.stringify(req.body)).digest("hex")}`; if (signature !== digest) { return res.status(403).json({ error: "Invalid signature" }); } exec("sh deploy.sh", (err, stdout, stderr) => { const status = { last_deploy: new Date().toISOString(), status: err ? "Failed" : "Success", output: err ? stderr : stdout }; fs.writeFileSync(STATUS_FILE, JSON.stringify(status, null, 2)); res.json({ message: "Deployment started", output: stdout }); }); }); app.listen(PORT, () => console.log(`Webhook server running on port ${PORT}`)); ``` 这里的 `sh deploy.sh` 是触发这个webhook后执行的命令,在这里你可以编写一个 hexo 构建静态文件并放到 web 目录的脚本, ```bash #!/bin/bash WORKDIR=/opt/xxxxx WWWDIR=/var/www/html/ cd $WORKDIR hexo clean hexo generate rsync -av --delete $WORKDIR/public/ $WWWDIR chown -R www:www $WWWDIR chmod 755 -R $WWWDIR ``` ### 3. 运行 Webhook 服务器 使用 `node server.js` 运行服务器,或者使用 `PM2` 进行守护进程管理: ```bash npm install -g pm2 pm2 start server.js --name webhook-server pm2 save pm2 startup ``` ### 4. 配置 GitHub Webhook #### 4.1 进入 GitHub 仓库设置 1. 打开目标仓库 2. 进入 **Settings -> Webhooks** 3. 点击 **Add webhook** #### 4.2 填写 Webhook 配置 - **Payload URL**: `http://ip:port/post-receive` - **Content type**: `application/json` - **Secret**: 填写与 `server.js` 中 `SECRET` 相同的值 - **Events**: 选择 `Just the push event` 点击 **Add webhook** 保存。 ### 5. 调试与测试 Webhook #### 5.1 手动测试 Webhook 可使用 `curl` 发送 `POST` 请求测试 Webhook 服务器: ```bash curl -X POST https://ip:port/post-receive \ -H "Content-Type: application/json" \ -d '{"ref": "refs/heads/main"}' ``` 如果 Webhook 服务器返回 `{ "message": "Deployment started" }`,说明 Webhook 服务器正常运行。 #### 5.2 查看 GitHub Webhook 日志 在 **GitHub -> Webhooks** 页面,检查 Webhook 是否成功 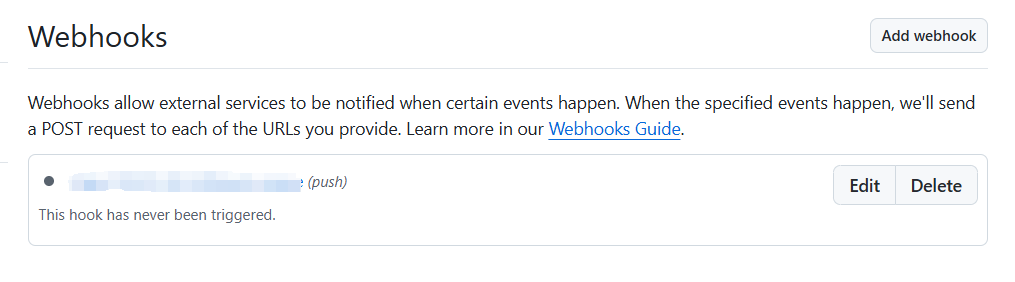 ### 6. 配置 Nginx 反向代理(可选) 在服务器 `nginx.conf` 配置 Webhook 反向代理: ```nginx server { listen 80; server_name wanghaoyu.com.cn; location /post-receive { proxy_pass http://127.0.0.1:5000; proxy_set_header Host $host; proxy_set_header X-Real-IP $remote_addr; proxy_set_header X-Forwarded-For $proxy_add_x_forwarded_for; proxy_set_header X-Forwarded-Proto $scheme; } } ``` 然后重启 Nginx 就可以了,,, ```bash nginx -t nginx -s reload ``` 效果: ```bash tail -f /var/log/hexo_deploy.log [2025-02-04 02:05:32] ✅ Hexo 部署成功! [2025-02-04 02:05:32] 🚪 部署完成,退出程序 [2025-02-04 17:29:55] 🚀 开始部署 Hexo [2025-02-04 17:29:55] 📂 拉取 Git 最新代码... [2025-02-04 17:29:59] Updating cc1b055..d5c5c49 Fast-forward source/_posts/typecho-migrate-to-hexo.md | 177 +++++++++++++++++++++++++++++++ source/about/index.md | 2 +- 2 files changed, 178 insertions(+), 1 deletion(-) create mode 100644 source/_posts/typecho-migrate-to-hexo.md [2025-02-04 17:29:59] 🧹 清理 Hexo 旧文件... [2025-02-04 17:30:03] INFO Validating config INFO Deleted database. INFO Deleted public folder. [2025-02-04 17:30:03] 🛠 生成 Hexo 静态页面... [2025-02-04 17:30:15] INFO Validating config INFO Start processing INFO Files loaded in 7.4 s INFO Generated: atom.xml INFO Generated: search.xml INFO Generated: sitemap.xml INFO Generated: about/index.html INFO Generated: categories/index.html INFO Generated: tags/index.html INFO Generated: tools/index.html ......此处省略 INFO 190 files generated in 3.92 s [2025-02-04 17:30:15] 🚚 复制文件到 Web 目录... [2025-02-04 17:30:16] sending incremental file list ./ 404.html atom.xml index.html search.xml sitemap.xml about/ about/index.html archives/ archives/Hexo-install.html archives/Kubernetes-architecture-and-data-flow.html ......此处省略 sent 8,200,909 bytes received 4,701 bytes 5,470,406.67 bytes/sec total size is 8,181,749 speedup is 1.00 [2025-02-04 17:30:16] 🔒 设置 /var/www/html 权限为 www:www 755 [2025-02-04 17:30:16] ✅ 权限设置成功 [2025-02-04 17:30:16] ✅ Hexo 部署成功! [2025-02-04 17:30:16] 🚪 部署完成,退出程序 ``` 这里这个脚本我用 Python写的,配合smtp服务实现状态通知, 最后说一句; All IN JavaScript! (手动狗头) Loading... 最近“心血来潮” 将博客网站迁移到了 Hexo,但是 Hexo 部署到 服务器后,由于我是多服务器+Vercel的环境,为了方便,就想了一个办法,实现了与Vercel一样的功能,使用 GitHub WebHook ,下面介绍一下实现过程 ### 1. 先介绍一下什么是什么是 Webhook Webhook 是一种基于 HTTP 回调的机制,允许应用在特定事件发生时向指定 URL 发送 `POST` 请求,从而触发后续操作。例如,GitHub Webhook 可在代码推送时触发,这里我设置了一台主服务器,通知服务器通过脚本拉取最新代码完成部署,然后同步到其他服务器中 ### 2. Webhook 服务器配置 这里为了方便使用 Express写了个 Webhook 服务器,监听 GitHub 推送事件,并执行部署脚本。 #### 2.1 安装 Node.js 环境 可以参考我的另一篇文章: https://www.wanghaoyu.com.cn/archives/linux-nodejs-deploy.html? #### 2.2 创建 Webhook 服务器 在你的hexo目录下安装express以及相关依赖 ```bash pnpm install express crypto child_process fs ``` #### 2.3 编写 Webhook 服务器代码 创建 `server.js`,代码如下: ```javascript const express = require("express"); const crypto = require("crypto"); const { exec } = require("child_process"); const fs = require("fs"); const app = express(); const PORT = 5000; const SECRET = "secret"; // 在 GitHub Webhook 配置中填写相同的 Secret const STATUS_FILE = "./deploy_status.json"; app.use(express.json()); const getLastDeployStatus = () => { if (fs.existsSync(STATUS_FILE)) { return JSON.parse(fs.readFileSync(STATUS_FILE, "utf8")); } return { last_deploy: "Never", status: "Not deployed yet" }; }; app.get("/", (req, res) => { res.json({ message: "Server is running", status: "ok" }); }); app.get("/deploy-status", (req, res) => { res.json(getLastDeployStatus()); }); app.post("/post-receive", (req, res) => { const signature = req.headers["x-hub-signature-256"]; const hmac = crypto.createHmac("sha256", SECRET); const digest = `sha256=${hmac.update(JSON.stringify(req.body)).digest("hex")}`; if (signature !== digest) { return res.status(403).json({ error: "Invalid signature" }); } exec("sh deploy.sh", (err, stdout, stderr) => { const status = { last_deploy: new Date().toISOString(), status: err ? "Failed" : "Success", output: err ? stderr : stdout }; fs.writeFileSync(STATUS_FILE, JSON.stringify(status, null, 2)); res.json({ message: "Deployment started", output: stdout }); }); }); app.listen(PORT, () => console.log(`Webhook server running on port ${PORT}`)); ``` 这里的 `sh deploy.sh` 是触发这个webhook后执行的命令,在这里你可以编写一个 hexo 构建静态文件并放到 web 目录的脚本, ```bash #!/bin/bash WORKDIR=/opt/xxxxx WWWDIR=/var/www/html/ cd $WORKDIR hexo clean hexo generate rsync -av --delete $WORKDIR/public/ $WWWDIR chown -R www:www $WWWDIR chmod 755 -R $WWWDIR ``` ### 3. 运行 Webhook 服务器 使用 `node server.js` 运行服务器,或者使用 `PM2` 进行守护进程管理: ```bash npm install -g pm2 pm2 start server.js --name webhook-server pm2 save pm2 startup ``` ### 4. 配置 GitHub Webhook #### 4.1 进入 GitHub 仓库设置 1. 打开目标仓库 2. 进入 **Settings -> Webhooks** 3. 点击 **Add webhook** #### 4.2 填写 Webhook 配置 - **Payload URL**: `http://ip:port/post-receive` - **Content type**: `application/json` - **Secret**: 填写与 `server.js` 中 `SECRET` 相同的值 - **Events**: 选择 `Just the push event` 点击 **Add webhook** 保存。 ### 5. 调试与测试 Webhook #### 5.1 手动测试 Webhook 可使用 `curl` 发送 `POST` 请求测试 Webhook 服务器: ```bash curl -X POST https://ip:port/post-receive \ -H "Content-Type: application/json" \ -d '{"ref": "refs/heads/main"}' ``` 如果 Webhook 服务器返回 `{ "message": "Deployment started" }`,说明 Webhook 服务器正常运行。 #### 5.2 查看 GitHub Webhook 日志 在 **GitHub -> Webhooks** 页面,检查 Webhook 是否成功  ### 6. 配置 Nginx 反向代理(可选) 在服务器 `nginx.conf` 配置 Webhook 反向代理: ```nginx server { listen 80; server_name wanghaoyu.com.cn; location /post-receive { proxy_pass http://127.0.0.1:5000; proxy_set_header Host $host; proxy_set_header X-Real-IP $remote_addr; proxy_set_header X-Forwarded-For $proxy_add_x_forwarded_for; proxy_set_header X-Forwarded-Proto $scheme; } } ``` 然后重启 Nginx 就可以了,,, ```bash nginx -t nginx -s reload ``` 效果: ```bash tail -f /var/log/hexo_deploy.log [2025-02-04 02:05:32] ✅ Hexo 部署成功! [2025-02-04 02:05:32] 🚪 部署完成,退出程序 [2025-02-04 17:29:55] 🚀 开始部署 Hexo [2025-02-04 17:29:55] 📂 拉取 Git 最新代码... [2025-02-04 17:29:59] Updating cc1b055..d5c5c49 Fast-forward source/_posts/typecho-migrate-to-hexo.md | 177 +++++++++++++++++++++++++++++++ source/about/index.md | 2 +- 2 files changed, 178 insertions(+), 1 deletion(-) create mode 100644 source/_posts/typecho-migrate-to-hexo.md [2025-02-04 17:29:59] 🧹 清理 Hexo 旧文件... [2025-02-04 17:30:03] INFO Validating config INFO Deleted database. INFO Deleted public folder. [2025-02-04 17:30:03] 🛠 生成 Hexo 静态页面... [2025-02-04 17:30:15] INFO Validating config INFO Start processing INFO Files loaded in 7.4 s INFO Generated: atom.xml INFO Generated: search.xml INFO Generated: sitemap.xml INFO Generated: about/index.html INFO Generated: categories/index.html INFO Generated: tags/index.html INFO Generated: tools/index.html ......此处省略 INFO 190 files generated in 3.92 s [2025-02-04 17:30:15] 🚚 复制文件到 Web 目录... [2025-02-04 17:30:16] sending incremental file list ./ 404.html atom.xml index.html search.xml sitemap.xml about/ about/index.html archives/ archives/Hexo-install.html archives/Kubernetes-architecture-and-data-flow.html ......此处省略 sent 8,200,909 bytes received 4,701 bytes 5,470,406.67 bytes/sec total size is 8,181,749 speedup is 1.00 [2025-02-04 17:30:16] 🔒 设置 /var/www/html 权限为 www:www 755 [2025-02-04 17:30:16] ✅ 权限设置成功 [2025-02-04 17:30:16] ✅ Hexo 部署成功! [2025-02-04 17:30:16] 🚪 部署完成,退出程序 ``` 这里这个脚本我用 Python写的,配合smtp服务实现状态通知, 最后说一句; All IN JavaScript! (手动狗头) Last modification:April 25, 2025 © Allow specification reprint Support Appreciate the author Like 如果觉得我的文章对你有用,请随意赞赏